Have you ever seen high quality engraving that sparkled with character, and wondered how that was accomplished? Chances are that sparkle was a result of beveled cuts. Rarely does the engraver cut outlines without rolling the graver in and out, creating beautiful cuts that reflect light back to the viewer. Beveling is one of the most important things for the engraver to master, and one of the most challenging for beginners.
RULE OF THUMB
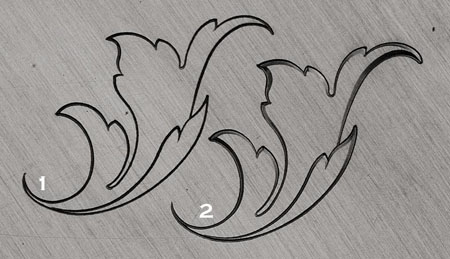
Nearly all portions of ornamental designs and scrollwork will be beveled to the inside of the design. That means that as the engraver cuts the outline of the design, he rolls the graver toward the inside, creating a beveled outline. The lines are not only beveled, but will frequently vary in width and depth, giving the design a three dimensional character. The fledgling engraver is usually grateful to make a cut of uniform width and depth, much less a controlled varying of width and depth, but as he or she develops more control, beveling cuts should be practiced until mastered. One exception to the rule of thumb would be the main line, or backbone, of scrollwork, which should not be beveled to the inside.
Quite often the beginner is confused about which way to tilt the graver to achieve the bevel. As I said, the graver will be tilted to the inside of the design, which will make the cuts slightly deeper on the outside. If you're still confused, think of a beveled mirror or beveled glass in a door. The glass is ground to produce a raised panel in the center. Beveled outlines in engraving will produce a similar effect, as the design will have the illusion of being raised. |