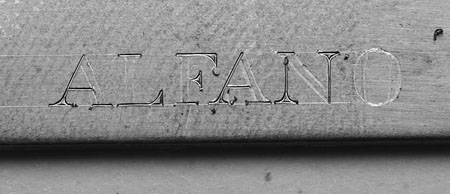
Roman lettering is especially useful for gun engravers as many lettering jobs on firearms use this classic style. It can be done in all sizes, and is especially pleasing when done in what I call microlettering, when signing your work. The production jewelry engraver will do an expedited version of what you see below, as this tutorial is relatively time consuming.
|
|
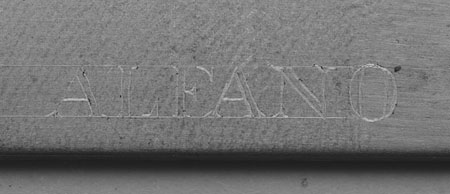
Step 1 - Using transfer wax dabbed onto the surface of the metal, I begin by scribing two horizontal lines with my dividers, taking care not to scratch too deeply. The letters are then drawn onto the surface of the metal with a 9H pencil sharpened to a needle point. Note that the 'O' extendes slightly above and below the guidelines. Curved letters such as O, C, S, G, etc, appear to be too short if engraved the same height as letters with flat tops and bottoms.
|
|
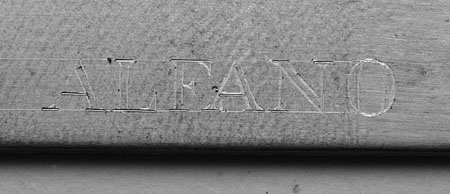
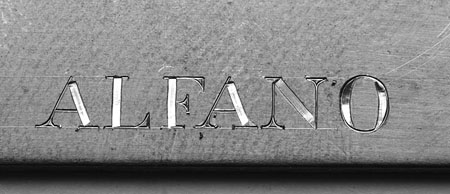
Step 2 - The horizontal lines are cut first, cutting from right to left.
|
|
Step 3 - The horizontal lines are now back-cut, since they have a tapered end where the graver entered the metal cutting from right to left. Place the graver into the line and cut back in the opposite direction of the first cut so that the line is even on both ends. Back-cutting is extremely important and absolutely MUST be done in order to produce expert results. This not only applies to lettering, but also to borders and many other areas of hand engraving. When I see work that's not been back-cut, it tells me that the engraver was in a rush and/or doesn't really care about his or her work. I have even seen professional engravers sign their work with lettering that's not been back-cut. Please don't be one of them.
|
|
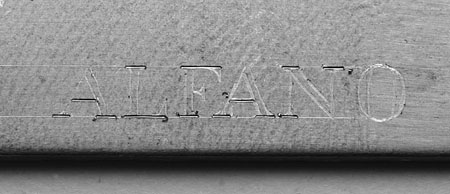
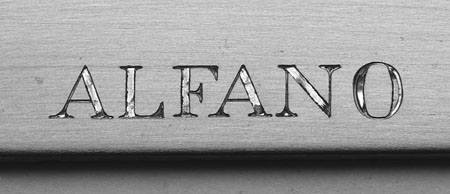
Step 4 - Next, the vertical hairlines get cut. I should add that all the cutting so far has been done with a 120º graver. These will also be back-cut as needed.
|
|
Step 5 - Using a #37 flat graver with 45º face and 15º heel, the wide strokes of the letters are cut. As you can see in the letters A and N, care must be taken not to cut outside the guidelines when cutting with the flat. I start just inside the guideline and cut as far as possible, then stop. The wide cuts in the O are cut by starting the flat graver on its left corner and cutting wider as the cut progresses, then going back to a narrow cut at the end. This is a bit tricky, but I've outlined the O first with the 120, so as long as I stay within my outline I'm okay. All flat graver cuts will be back-cut as well.
|
|
Step 6 - Areas that couldn't be removed with the #37 flat graver are trimmed away with smaller flat and square (not 120º) gravers. I make several passes over each and every line to assure they are clean and well balanced and sufficiently deep. At this point I can either stop or blacken the lettering. It looks pretty good either way.
|
|
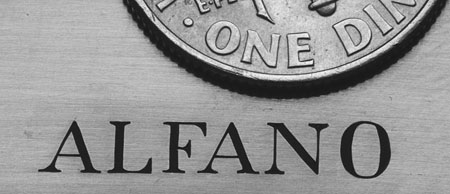
Step 7 - The letters are blackened with my highly specialized and super-secret blackening material (Rust-Oleum flat black paint). By the way, the letters are just a little over 2mm high.
Equipment used: GRS GraverMach and Monarch handpiece.  |