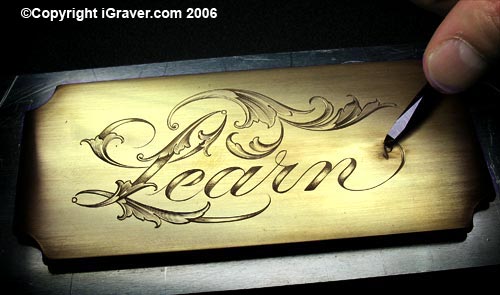
This design was drawn by hand onto a brass plate and outlined and shaded with a 120° graver.
In my tutorial on stippled script, I showed you how to texture the wide portions (called 'shade strokes') of script lettering to produce strong, dark lettering. In this tutorial I shaded the top and bottom portions of each shade stroke, leaving a light, unstippled highlight in the center. While it's relatively easy to produce dark stippling, stipple shading requires a lighter touch, as the shading must feather-out and get lighter and less dense as you move toward lighter areas.
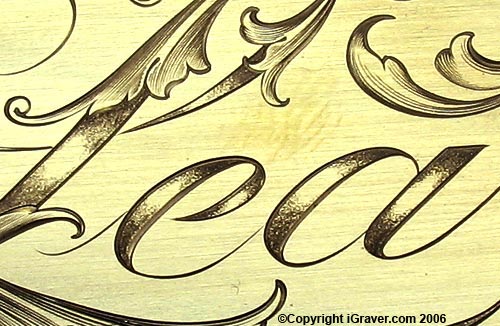
The shade strokes are dark at the bottom and top and get lighter toward the center.
I do all of my stippling under the microscope, and quite frequently tilt my vise a little to improve my view, as the stippling tool is held as perpendiclar as possible to the surface of the work. A slight angle is ok, but too much of an angle can result in stippling that changes color and texture as you rotate the work or change the angle of attack. Ideally, all stippling should be done with the handpiece held perpendicular to the work and without rotating the vise, resulting in a consistent texture. In the real world, the work is rotated and tilted as the stippling tool attacks the surface from different angles. Care must be taken to keep the tool sharp.
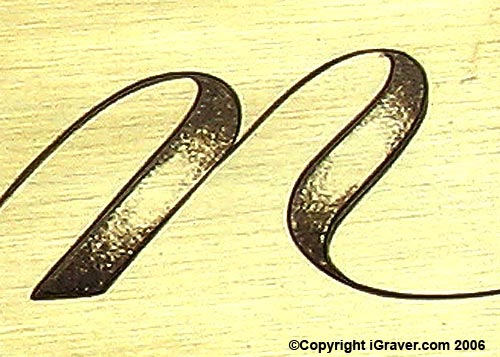
Note that the light area in the center is an oval shape, giving the letter a
realistic highlight.
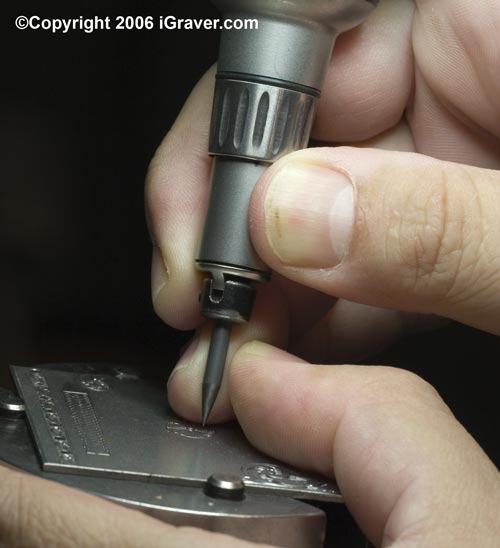
THE TOOL - I use a 1/8" round carbide tool sharpened to a needle point. While different textures can be achieved with slightly rounded points, I sharpen mine to a needle point for most of my work. Some engravers prefer to facet the point with 3 or 4 flats as opposed to a round point. Faceting the point can produce very nice shades of grey and black, so try it and see how you like it. If you don't have a carbide stippling tool, get one as soon as possible. While steel points can work for awhile, they can quickly begin to dull and introduce inconsistencies in color and texture. Carbide is the ideal material.
I hold the handpiece upright with the stippling point suspended above the workpiece and, pressing firmly against the tip of my right ring finger, apply quite a bit of throttle which creates a up-down movement of the point. You should not place the tool on the surface and 'write' as you would with a ballpoint pen. Keep it suspended above the surface and throttle the machine for an up-down movement. My vise is tilted a few degrees and my handpiece is angled back slighly, which allows me to see end of the point when viewing through the microscope.
A slow motion animation shows the action of a stippling point at work. Considerable power must be used for the handpiece to respond with this up-down movement. This allows you to feather the stippling for light areas, as well as to achieve deep, dark stippling for background areas. Note that the tool is pressed tightly against the tip of my right ring finger.
A long taper on a stippling tool makes it easier to see the point under the microscope.
I normally operate my GraverMach at around 5,000 strokes per minute when stippling. For stipple shading you should experiment with different stroke speeds and find one that allows good control, especially as you feather the shading toward the light areas.