Brightcut script lettering requires a fair amount of experience and graver control, and should be a goal of every engraver. While lettering may or may not interest you, developing the skill set required to cut it will make you a better and more diverse engraver. Once learned, lettering is fun and very satisfying.
The illustrations below show a relatively simple style of script lettering that nearly all beginners can do. All that's required is the ability to cut basic curved outlines. Brightcutting is an optional step for the more experienced engraver, but not necessary to produce a striking and beautiful monogram that will delight customers. |
 |
|
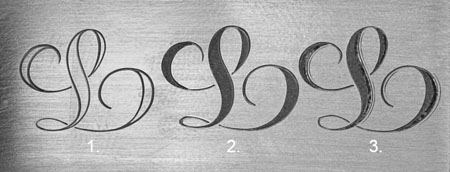
In example 1 I have drawn and outlined a script letter L with a 120° graver. The lines are boldly cut and will provide a solid area for the next step. In example 2 the inside of the letter has been stippled with 1/8" round carbide sharpened to a needle point. For stippling I hold the handpiece upright and set the GraverMach to 4200 strokes per minute, and make small, rapid circular motion with the tool suspended over the surface of the metal. When given enough power with the throttle, the point will dance across the surface of the metal without digging-in. As you can see, the completed stippled letter is dark and striking. In example 3, an optional brightcut is applied to the right side of each broad portion of the letter. This creates a beautiful effect and the letter appears to rise from the surface. A second optional step is a light hairline cut on the right side of the letter segments. This creates a subtle and elegant drop shadow.
Be sure to stipple thoroughly. The entire surface must be densely covered with stippling to produce a smooth dark finish. You should frequently inspect the work for shiny areas and cover them immediately. Having portions of the letter reflecting light from unstippled areas seriously detracts from the quality of the job. Be careful not to let this happen.
|
|
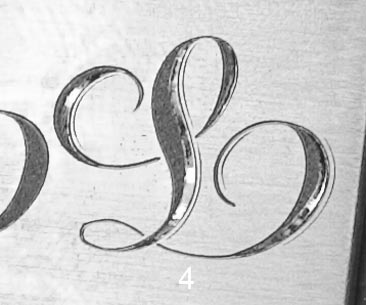
Example 4 is the same as example 3 above, but a different camera angle to show the brightcutting.
Check out the tutorial on stipple shading for a different approach.  |