No, it's not just you. We all experience graver slips. Yes, even the pros. Don't let anyone tell you otherwise. Slips are a fact of life in the engraving business, and while it's important to know how to repair them, it's equally important to know why they occurred in the first place.
DULL GRAVERS can cause slips. The point should be sufficiently sharp to keep the graver biting into the metal. A dull graver can have a tendency to ride out of the cut and go skidding across your workpiece, causing grief, lost time, and outbursts of words unsuitable for children. It bears repeating....keep your gravers sharp!
BROKEN GRAVERS - When the point breaks, a microscopic piece of graver point often remains in the cut and the rest of the graver is sent skidding its merry way across your work. There's not much you can do to anticipate this, but I can tell you that experienced engravers can often detect a problem in a nanosecond, and can stop before the slip becomes catastrophic. Not always, but often. By the time the beginner has noticed he's slipping, it's often too late to recover.
PUSHING - Avoid pushing the handpiece! Handpieces should be guided, not pushed. If you're pushing then you increase the risk of slipping. Let the handpiece do the work and just guide it along. New GraverMach users who have pushed hand gravers for many years usually have difficulty breaking the habit of forcing the graver through the metal. This is quite common and will be overcome with patience and persistence.
LACK OF GRAVER CONTROL - Inexperienced engravers have not developed control and are not expected to handle tools like the pros. As an engraver gains experience, his or her control improves and periods of errors and inconsistency in cutting grow shorter and shorter. In comparison, an experienced motorist's mistakes can be much less disastrous than a teenager's first months behind the wheel. In the hands of an experienced engraver, the tool becomes an extension of the hand, and he or she wields it with confidence and precision.

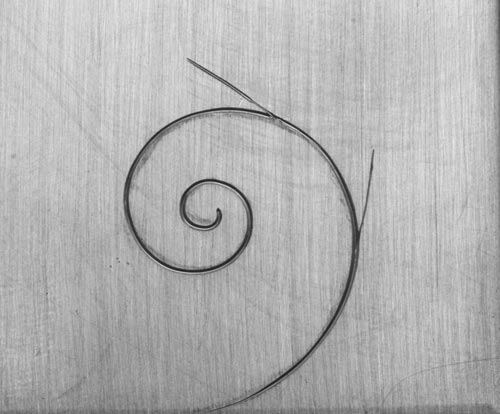
This photo shows two common slips. You're cutting a scroll and then suddenly you're sailing off onto your workpiece and making an ungodly mess. Hey, don't worry...we're going to fix this!
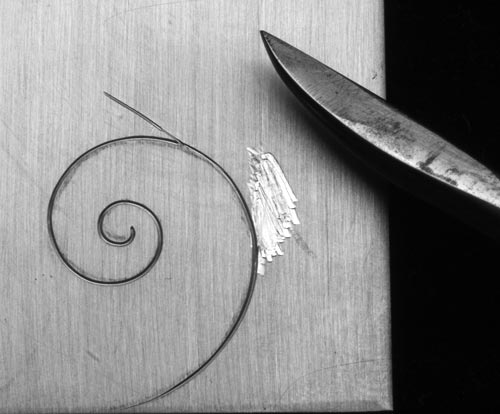
The top slip is deeper, so I will repair the lighter slip first by burnishing and refinishing my work. |

The burnisher is simply a piece of curved steel or carbide that's been shaped and polished to a mirror finish. You can buy burnishers or make them yourself. The curved bottom is the side you use. Apply quite a bit of pressure and 'smear' the surface of the metal back together by rubbing the burnisher across the slip. I burnish in the direction of the slip at first, then switch directions and burnish across the slip. You can see the polished marks left on the workpiece from the burnisher, and the incision has been neatly closed.
|

After burnishing and refinishing, the bottom slip is eliminated.
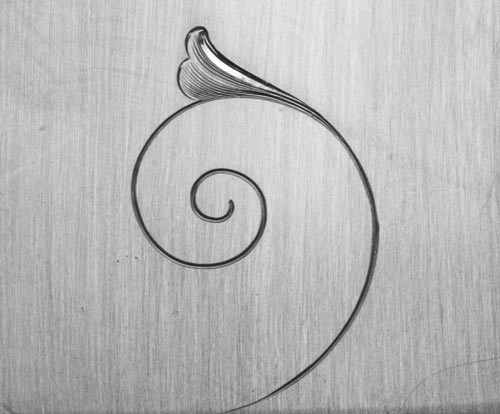
Since the top slip was so deep, I decided to turn it into a leaf by guiding my main leaf cut through the slip. What little remained was hidden with shade cuts. Sometimes this is the best approach.
|
Don't let this tutorial fool you. Slips are not always this easy to repair. Sometimes they're easier and sometimes they're far more difficult. After fine shading has been initiated, a slip can be a catastrophic event, as fine shading cannot withstand polishing and refinishing without being ruined. If this occurs, you may be forced to do a lot of very delicate recutting. A slip in bulino engraving can be even worse, as it's simply impossible to repair without ruining untold hours of work.
Keep your tools sharp, constantly strive to improve your graver control, and when the slip does occur, hopefully you'll be better prepared to handle it.  |


